How to properly splice an inverter cable (video tutorial)
A step-by-step guide on how to properly splice an inverter cable.
1 If an inverter on your new screen is shorter than needed you can easily solve this problem.
For this procedure you will need wire cutters or scissors and two spare wires that you can take from headphones, out cables, speakers or another broken screen.
For this procedure you will need wire cutters or scissors and two spare wires that you can take from headphones, out cables, speakers or another broken screen.

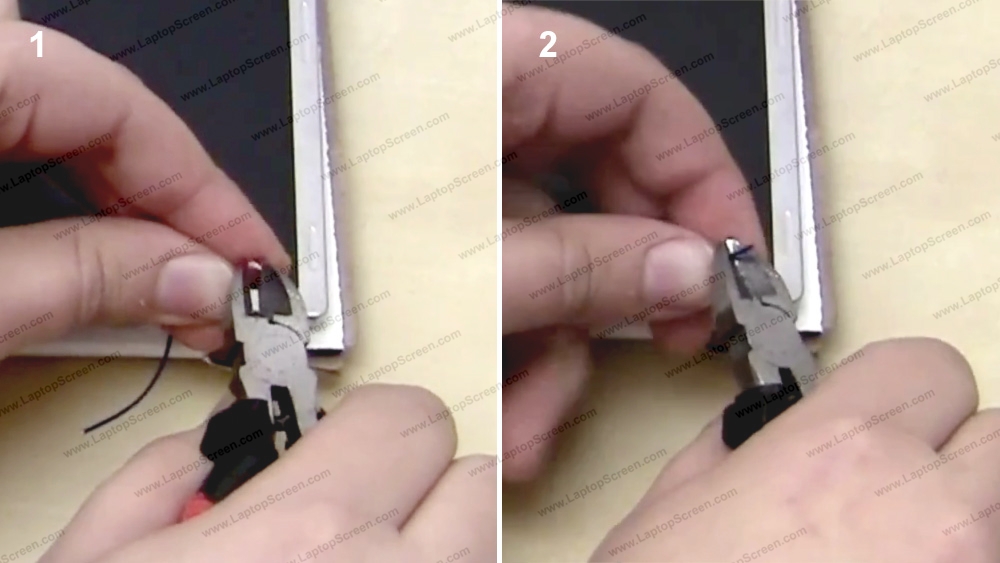
2 Use wire cutters or scissors to cut through the inverter cable right in the middle.

3 Prepare the connections. Keep in mind that the spare wires should exceed or match the thickness of the original ones. Thinner wires might cause a potential fire hazard!
Start with your spare wires first, this way you can practice a bit before moving on to the inverter connections.
Strip off some insulation from the cables, then twist an exposed end a few times.
Start with your spare wires first, this way you can practice a bit before moving on to the inverter connections.
Strip off some insulation from the cables, then twist an exposed end a few times.

4 Repeat the same procedure for the inverter jack leads. Be careful not to cut the wire itself, but just the insulation around it.

5 Now it is the most sensitive part. Move on to the inverter leads on the LCD panel. Strip off the insulation and twist each wire afterwards.
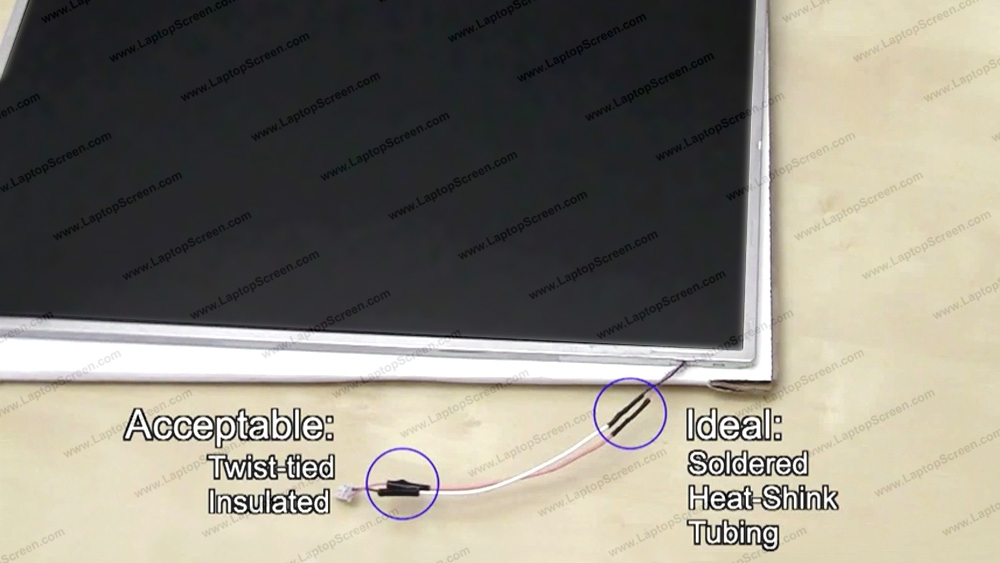
6 Now twist tie the inverter jack lead with one of the spare wires and secure it an insulation tape.
You can use clear scotch tape, a medical, masking or duct tape.
Please don't use an aluminum tape since it eliminates the entire point of insulation.
You can use clear scotch tape, a medical, masking or duct tape.
Please don't use an aluminum tape since it eliminates the entire point of insulation.

7 Repeat the same procedure for the second wire.

8 Before connecting the LCD wires with the new extended spare wires dip both of the connectors into acid paste flux. It makes soldering much easier.

9 Spread some of the acid paste flux on the inverter lead.

10 Use heat shrink tubing for the insulation of the second pair of connections. Apply it before completing the connection.

11 Align the leads and using soldering iron attach the wires.

12 Slip the insulation tape onto the connection area to protect it.

13 Swipe the soldering iron across the insulation to make it shrink and fix it in position.

14 And you're done!
last updated June 14, 2018