Please watch the following video (highly recommended), or follow the step by step instructions below:

This is a guide on reinstalling the front glass digitizer and the LCD display on the second generation Apple iPad.
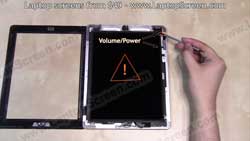
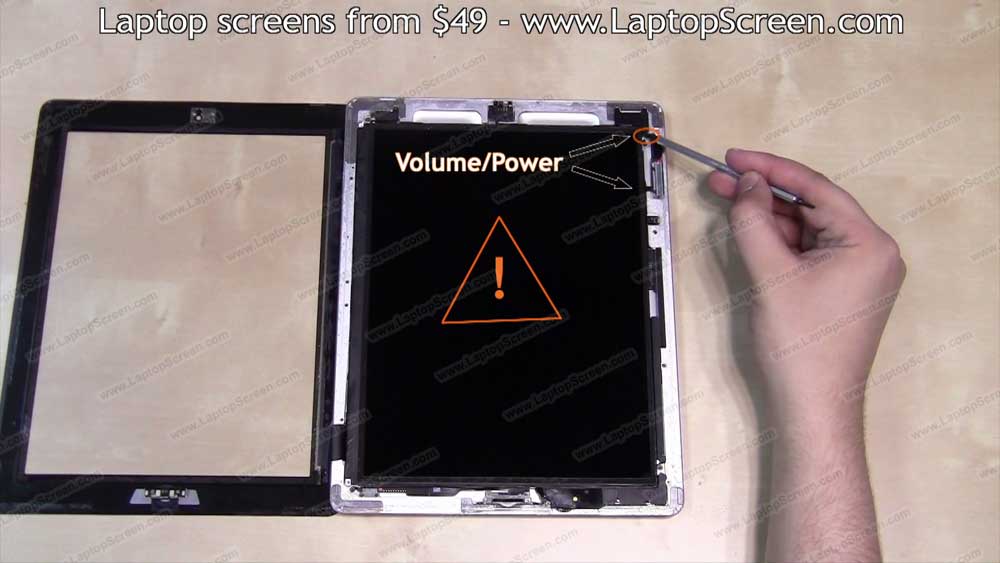
As well as the volume and power buttons cable can be damaged in two spots. You should be extremely careful around those areas,
since breaking those cables will disable vital functions, and will require extra parts and time to repair.

There's plenty of adhesive in the iPad, and it helps knowing where it is located.
First there is the outer edge, where the plastic rim surrounding the glass meets with the aluminum groove.
Then there is the second ring of adhesive which bonds the glass to select parts of the body.
And last, there is a foamy dust shield around the LCD screen which also adheres to the actual glass.

As usual we are using the most basic tools such as a putty knife and a small philips screw driver.
However if you have access to a heat gun, or a hair dryer, you may consider using it to soften the adhesive around the edges.

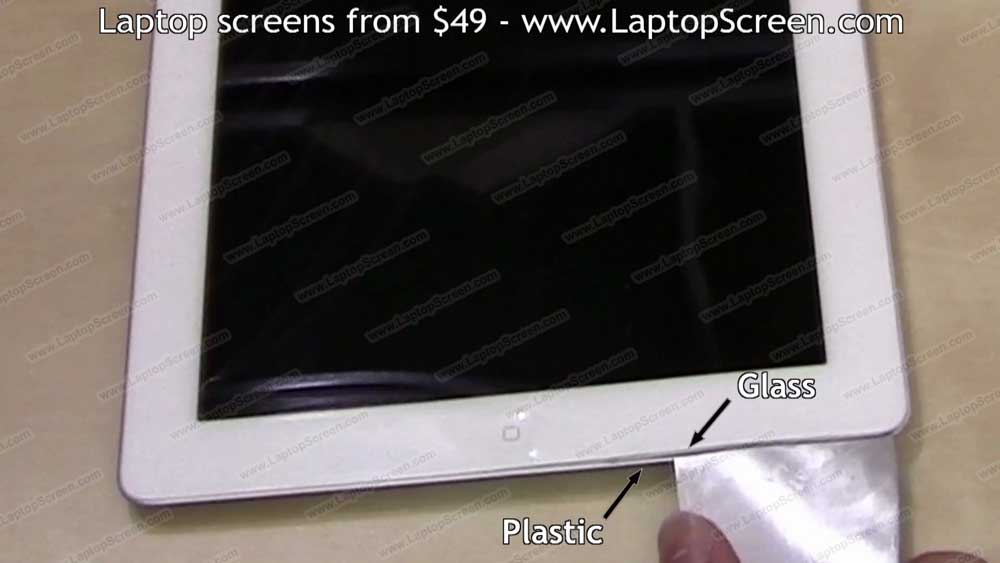
The best place to start opening the iPad is the right bottom corner, just a few inches away from the wireless antenna.
Please note, even though the plastic lip is part of the digitizer assembly, we recommend inserting your putty knife between the glass and the plastic,
that way you can prevent leaving marks on the aluminum body. However you will not be able to reuse the original digitizer anymore.
In our case the digitizer is clearly broken, and we strongly caution users to not open their iPads unless they are actually broken.

Gently work your way around the edges, moving from the right side to the left, going back and fourth on each edge, until full separation is achieved.
The adhesive is fairly strong, so please make sure you are positioning your knife in a controlled manner,
so that you are able to safely apply the force needed and are able to prevent damage from the knife.
Take extra care around the webcam area, and try to use fingers whenever possible.

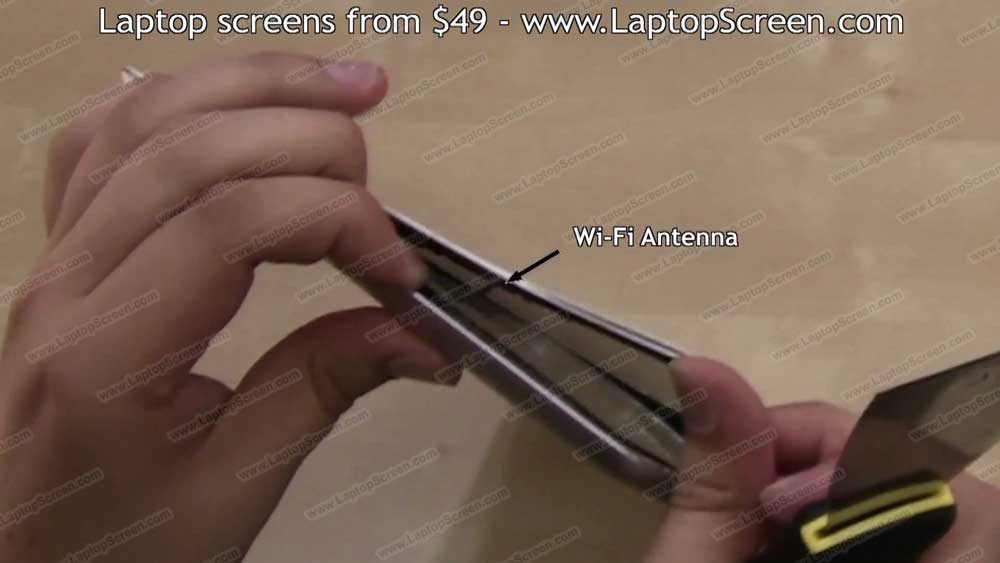
Once you have separated the right edge, make sure to separate the Wi-Fi antenna from the digitizer before proceeding any further.

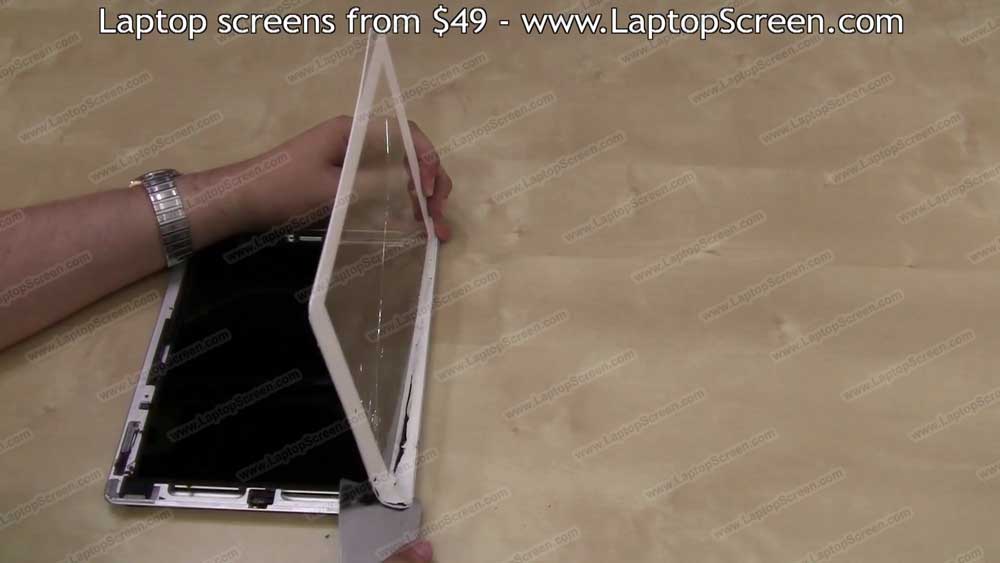
Now that the antenna is secured it is safe to continue separating the glass away from the body. In cases when the digitizer is badly damaged,
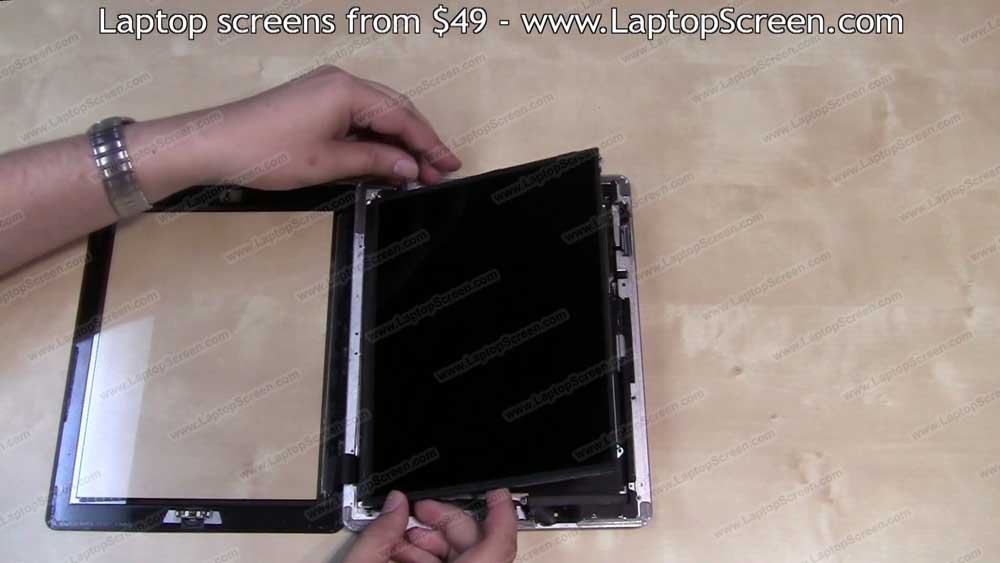
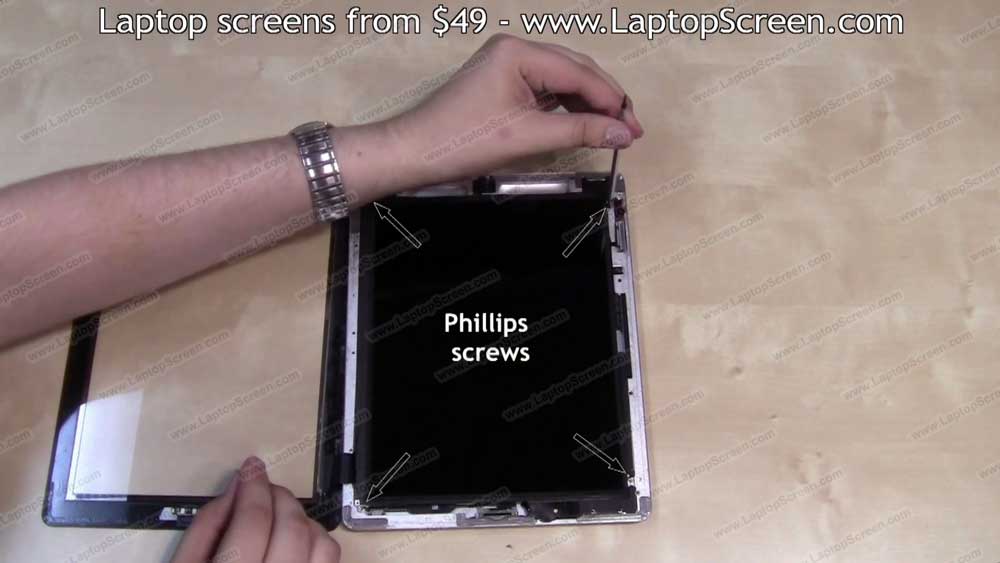
it may have to come out in small pieces. Open the digitizer as far as you can, and proceed with removing the LCD screen.
It has to come out first so the digitizer can be disconnected.

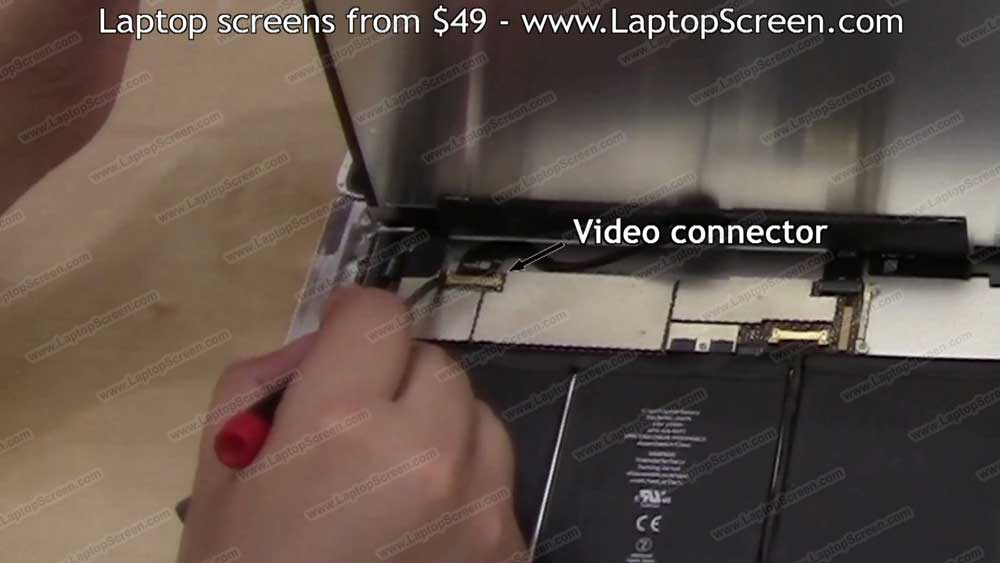
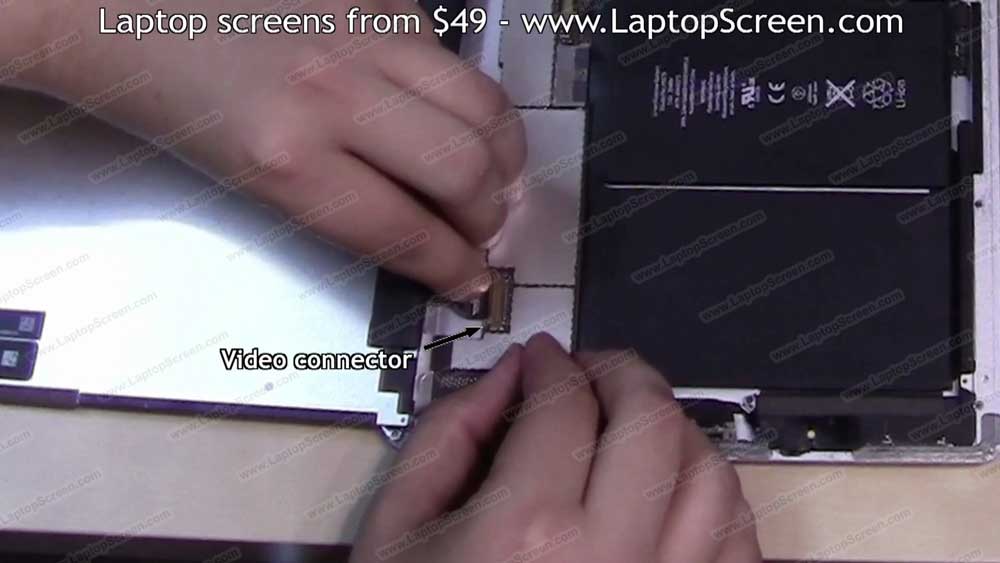
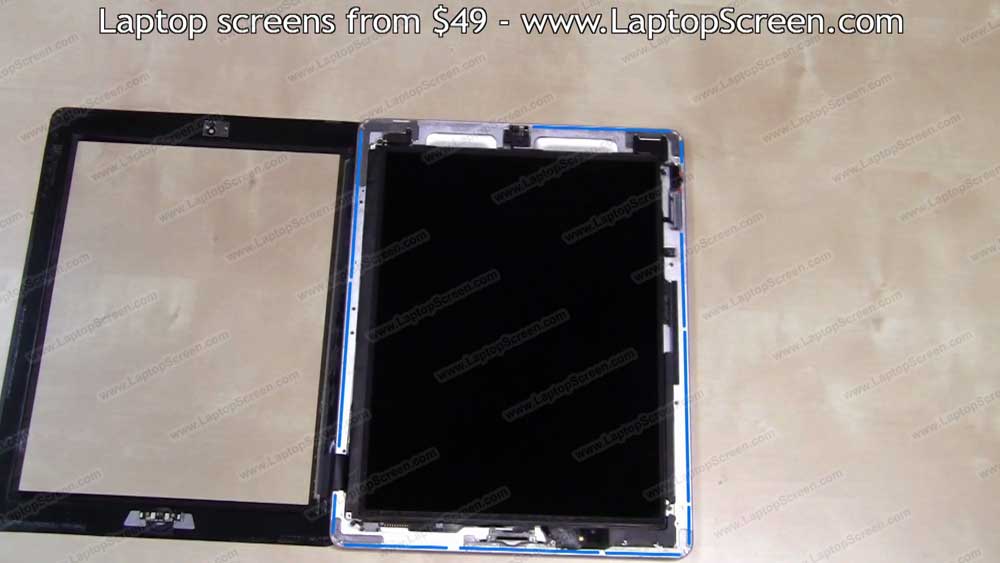
Then lift the LCD panel, and use a flat pick or a screw driver to open the video connector's bracket and to disconnect the screen. Place the screen aside.
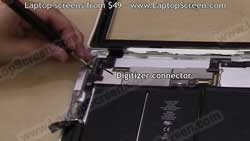
Then, using the same pick, open the digitizer connector's latches, there are two of them on the opposite side of where the ribbon cable slides out.
It is very important to make sure that the latches are properly open, since forcefully removing the ribbon cable will most likely cause irreversible damage to the connector,
and the entire logic board will have to be replaced.

Separate the old digitizer completely. In this case the digitizer is severely damaged, and we recommend cleaning up the remaining glass above a garbage bin,
since glass pieces are tiny and extremely sharp, it is best to contain them immediately.
Once you have cleaned up the main body of the remains of the original digitizer, everything can be put back together.
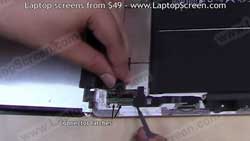
Reconnect the LCD display's video connector. Make sure the connector is plugged in all the way, and the bracket is closed properly with a screwdriver.
Slide the replacement glass underneath the LCD and reconnect the digitizer connector. Ensure that both connector latches are up before sliding the ribbon cable in.
Using a screwdriver guide the ribbon cable back in place and secure both latches.


In order to properly close and seal the digitizer, some preparation must be conducted.
We highly recommend that you ensure that there are no inward nicks or dents on the most outer rim of the body.
It is typical for the iPad to have some dents on the corners, and the original point of impact which broke the digitizer.
Use a screw driver and pliers or any other suitable tools to bend out all the imperfections,
so that the new digitizer can sit perfectly flush to the body.

To seal the digitizer we are using Scotch branded 3M double sided adhesive tape. You could use some other forms of adhesive like superglue,
but it is best to use something which can be opened for service afterwards. You must do your best to clean out as much of the old adhesive as possible.
Then cut your tape in appropriate width pieces. Strips of approximately 2 millimetres have to line the entire perimeter of the body in the outer groove.
Use your screwdriver to properly position the adhesive in the groove.
Then place appropriately sized pieces all around the second adhesive perimeter.

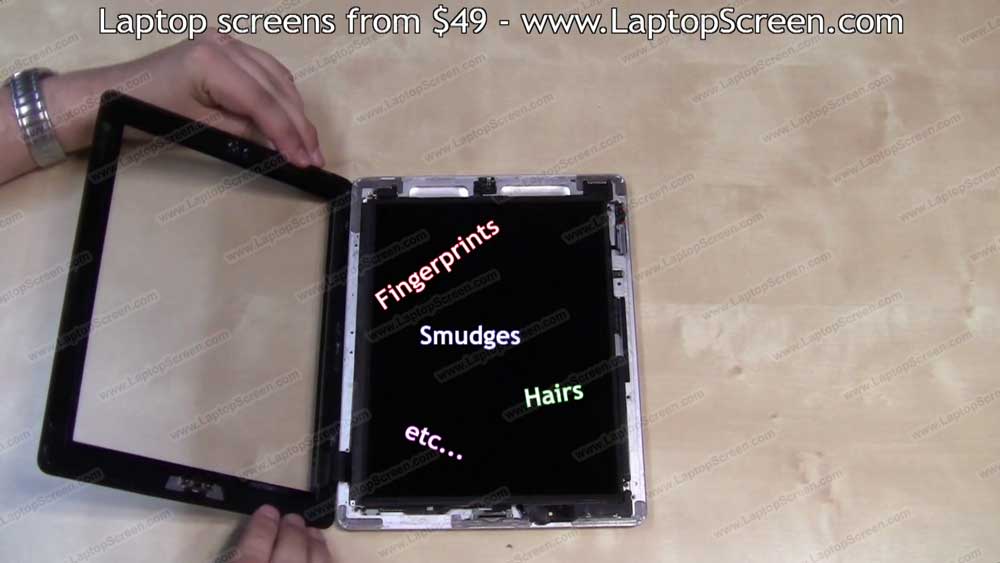
At this point you could close the digitizer. However we highly recommend that you carefully inspect the surface of the LCD display,
and remove any smudges, dirt, fingerprints, hairs, or anything else visible on the screen, since you would have to reopen the glass and reapply adhesive in order to clean up the screen.

Close the digitizer starting from the left edge, ensuring that the plastic rim is sitting flush to the groove.
It takes some patience to align the plastic rim and you could use an exact-o-knife to carefully shave off some plastic to properly sink it into the groove.
Once a proper alignment is achieved, apply weight on top of the iPad, and let it sit overnight for the adhesive to properly cure.
And you are done.