Installation d'écrans LCD
*** Tutoriels vidéo affiché en premier, pour l'étape-par-étape photo-guides s'il vous plaît faites défiler ***
Cette première vidéo est un must pour se faire une idée générale sur le processus de remplacement d'écran:
Voici un Mac Book Pro 15 "écran vidéo d'instructions en mutation:
Dell étape par étape le remplacement d'écran:
IBM ThinkPad étape par étape le remplacement d'écran:
Acer étape par étape le remplacement d'écran:
Toshiba étape par étape le remplacement d'écran:
ASUS étape par étape le remplacement d'écran:
SONY étape par étape le remplacement d'écran:
Et voici l'étape par étape les instructions imprimées sur LCD de remplacement.
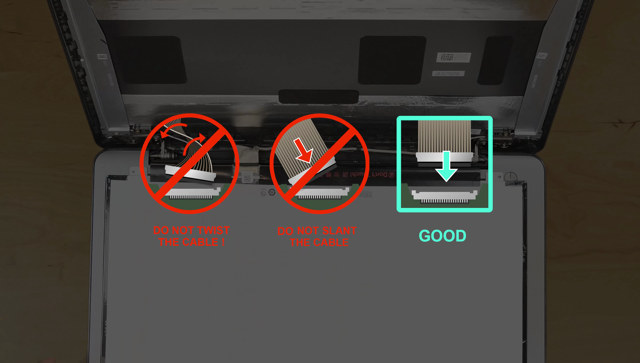
IMPORTANT! Laptop pièces internes, câbles et les prises sont très fragiles et faciles à crack, d'arracher ou de frein. S'il vous plaît soyez prudent. C'est aussi une bonne idée d'utiliser une sorte d'organisateur d'organiser vis par les étapes du démontage afin que vous puissiez suivre le processus dans l'ordre inverse lors de l'assemblage de l'écran. Certains fabricants de fournir des cartes à vis et de pièces pour faciliter ce processus.
Pour les liens vers des instructions sur les ordinateurs portables Apple défiler vers le bas de cet article.
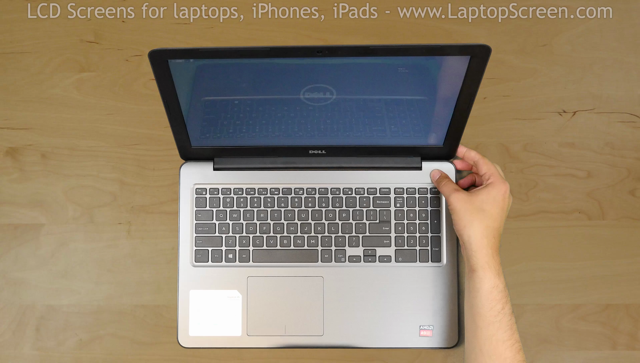
How to replace LCD on a laptop (Inspiron 15 5000)
This is a guide on replacing an LCD on a Dell Inspiron 15 5000 Series.
Picture guide below:
Picture guide below:


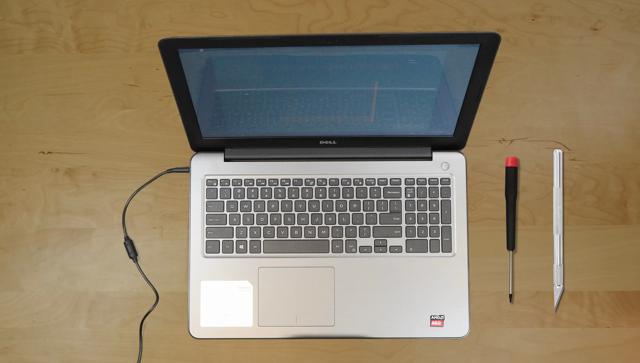
For the replacement process we’ll need the following tools:
- a Phillips screwdriver
- and an X-Acto knife
- a Phillips screwdriver
- and an X-Acto knife
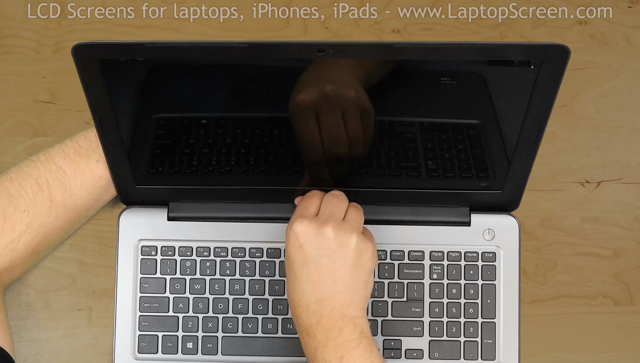
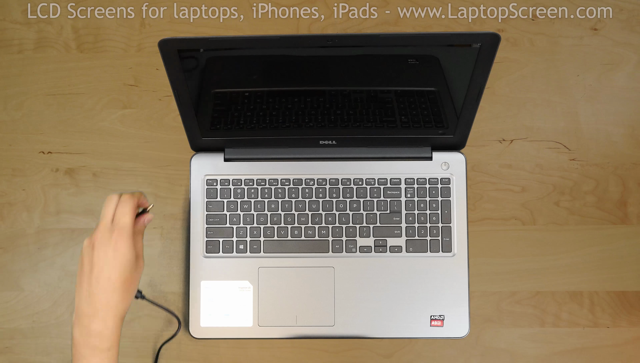
To begin, shut down the laptop and disconnect the power cord.
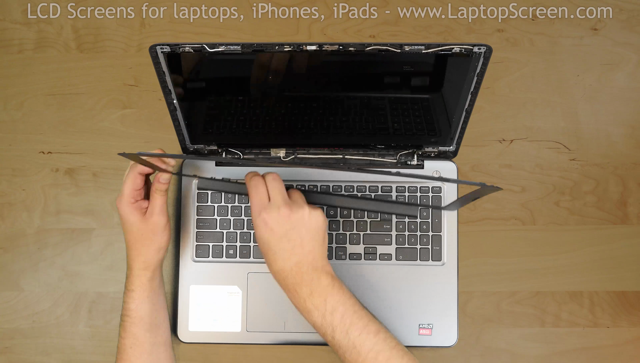
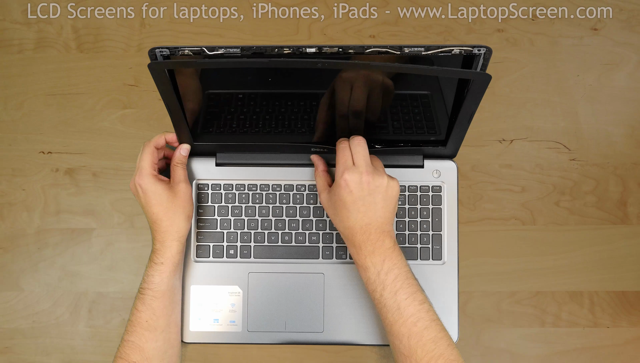
Next step is to remove the bezel. Start from the left side. Pull the inner edge away from the glass. Once the edge is unsnapped proceed to the left top corner.
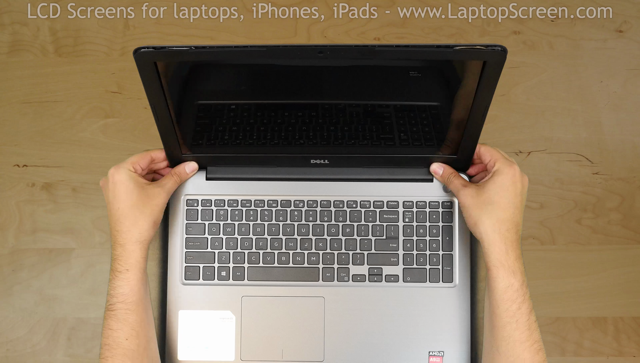
Move along the perimeter to the right side. And to the bottom. Set the bezel aside.
Now we have access to the LCD panel. Remove four phillips screws holding the screen in place. One screw in each corner.
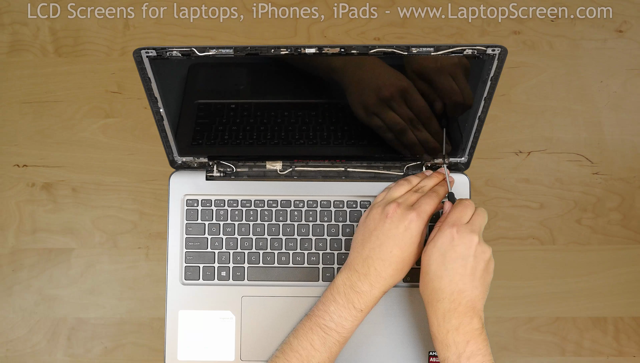
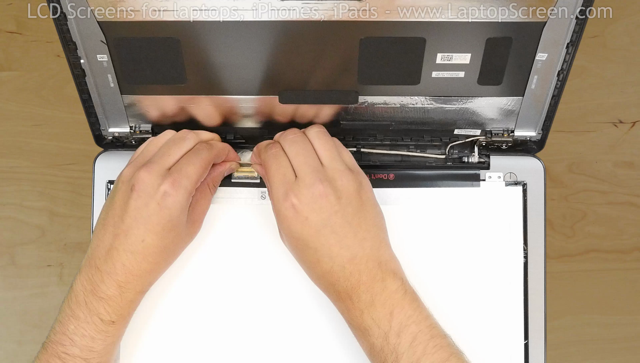
Place the LCD panel on the keyboard. Using an X-Acto knife peel off the tape securing the video connector.
Open the connector’s bracket. Using both hands gently disconnect the video connector. Discard the old panel.
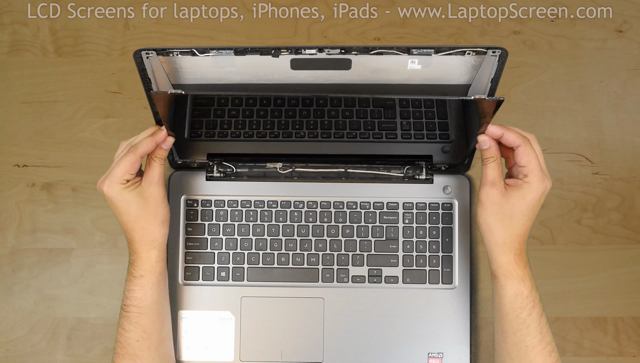
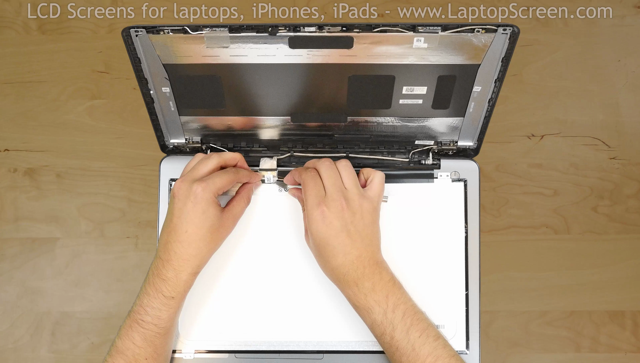
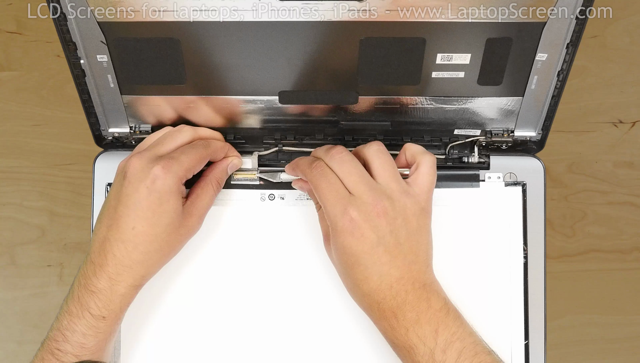
Take the new LCD screen and place it on the keyboard. Using both hands reconnect the video cable. And close the bracket.
Secure it with the protective tape.
Secure it with the protective tape.
CAUTION! It is very important not to force any of the connectors. As well you must not twist or slant the connector when plugging it in.
Lift the screen up aligning it with the screw holes.
Replace the four phillips screws.
Replace the bezel. Start at the bottom
corners, then go around the perimeter snapping the tabs in place.
corners, then go around the perimeter snapping the tabs in place.
Snap the tabs near the hinge cover by supporting the back cover with one hand and firmly pressing on the front with the other.
Turn the laptop on. If the start up graphics appear the replacement screen is installed correctly and we are done!
last updated October 16, 2020