Touch controller board transfer
Parts may vary for various laptops and in-cases where a screen is shipped together with the touch digitizer the original touch controller may or may not need to be reused.
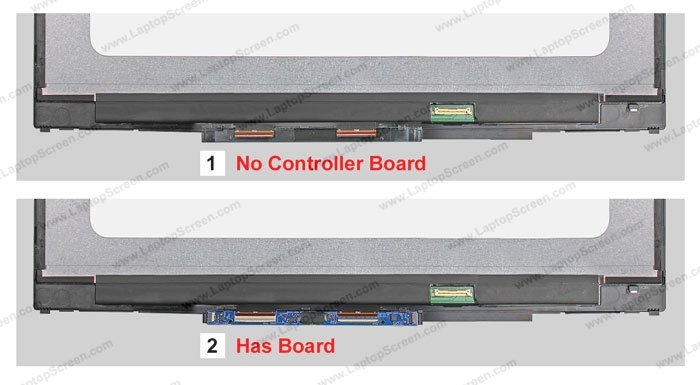
Touch digitizer equipped display assemblies may come:
1. With no controller board.
2. With controller board pre-instlaled.
Touch digitizer equipped display assemblies may come:
1. With no controller board.
2. With controller board pre-instlaled.
Touch digitizer controllers are commonly equipped with locking counter-level connectors that secure the digitizer's flex cables to the controller.
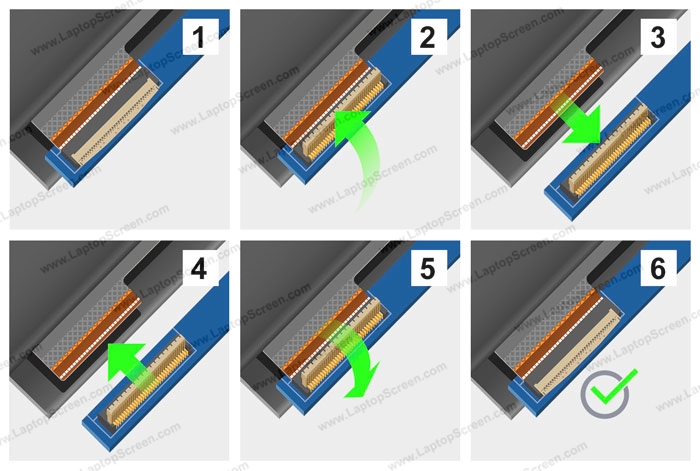
In order to transfer the touch controller the connectors need to be unlocked:
1. Locking connector (black) with the counter-lever (grey) in locked position.
2. Counter-lever (grey) is lifted 90 degrees.
3. Flex cable is free to be separated.
4. Thread the digitizer controller onto the flex cable, making sure the white line on the flex cable is all the way up to the connector.
5. Rotate the counter-lever down by 90 degrees to lock the connector.
6. Completed connection.
Once the touch controller is removed from the old assembly:
1. Align the controller board with the two digitizer flex cable leads.
2. Thread both flex cables onto the respective connectors.
3. Make sure the white line is all the way up to the connector. Lock the first connector.
4. Lock the second connector.
1. Align the controller board with the two digitizer flex cable leads.
2. Thread both flex cables onto the respective connectors.
3. Make sure the white line is all the way up to the connector. Lock the first connector.
4. Lock the second connector.