HP Pavilion G6 LCD Installation Guide
This is a general LCD replacement tutorial made by LaptopScreen.com. Not your specific model? Click here to search our video library for a model specific guide.

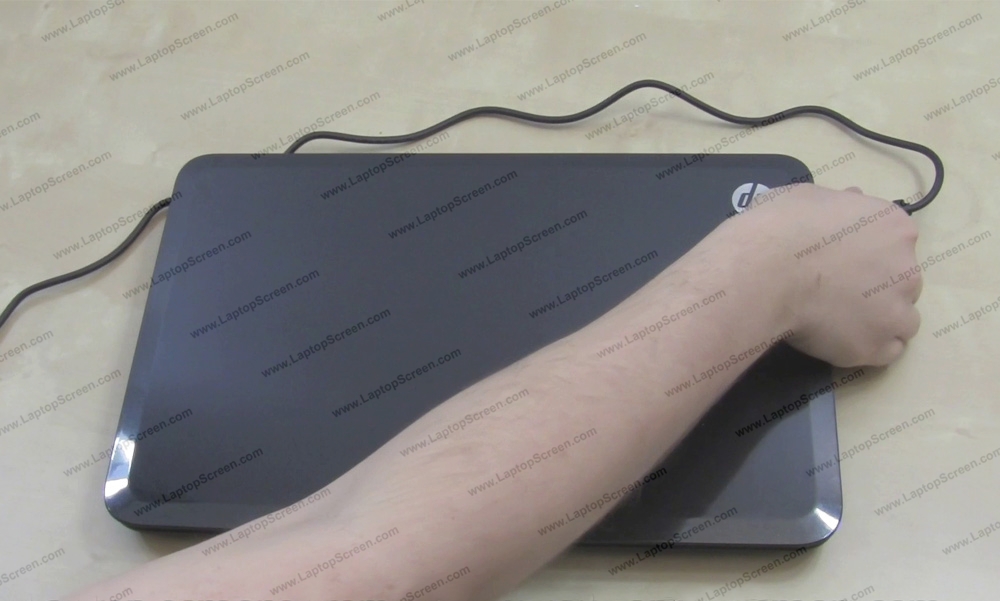
1 Please disconnect the power from your laptop before changing an LCD panel.
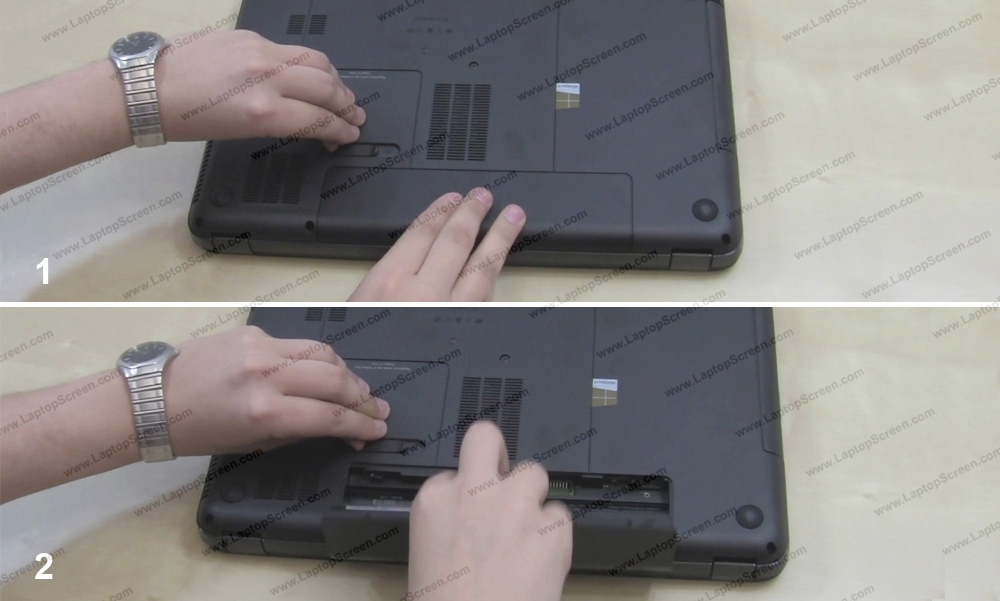
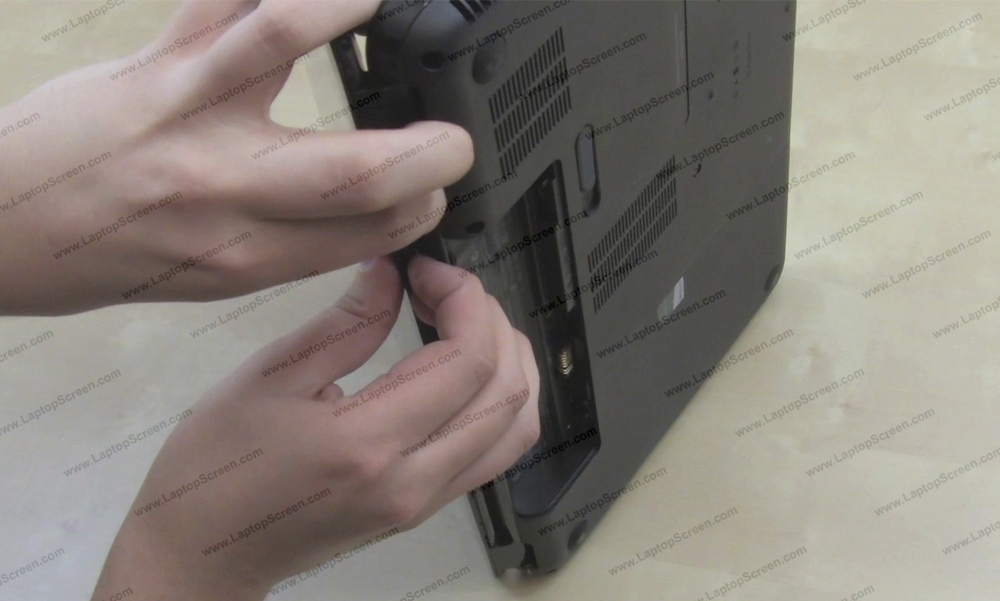
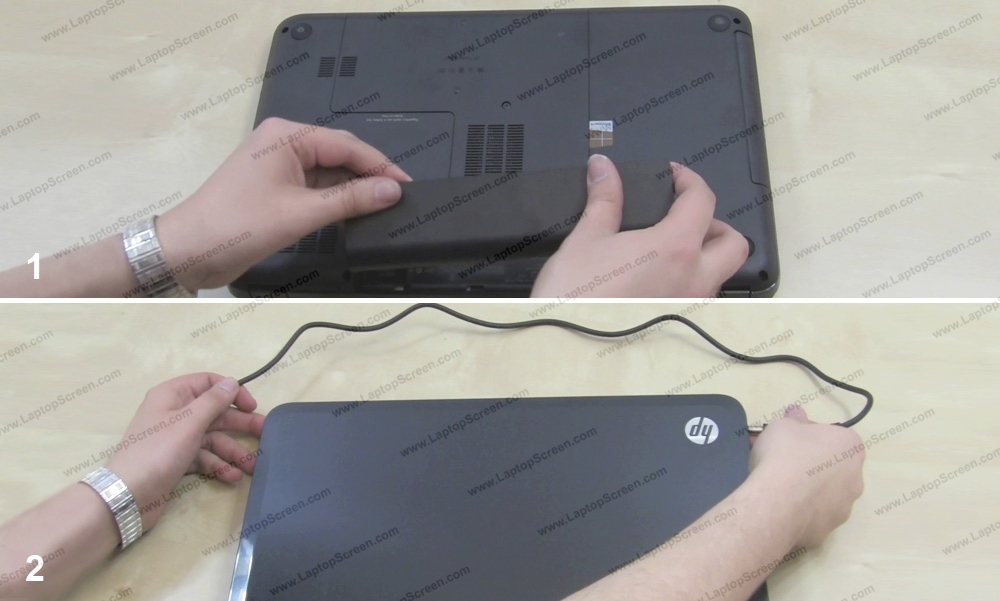
2 Remove the battery.
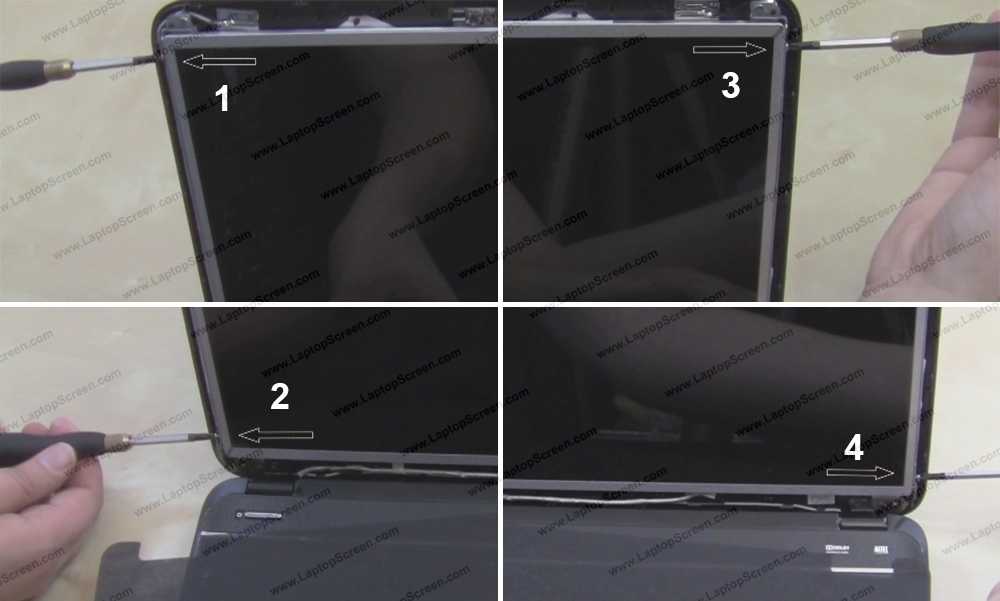
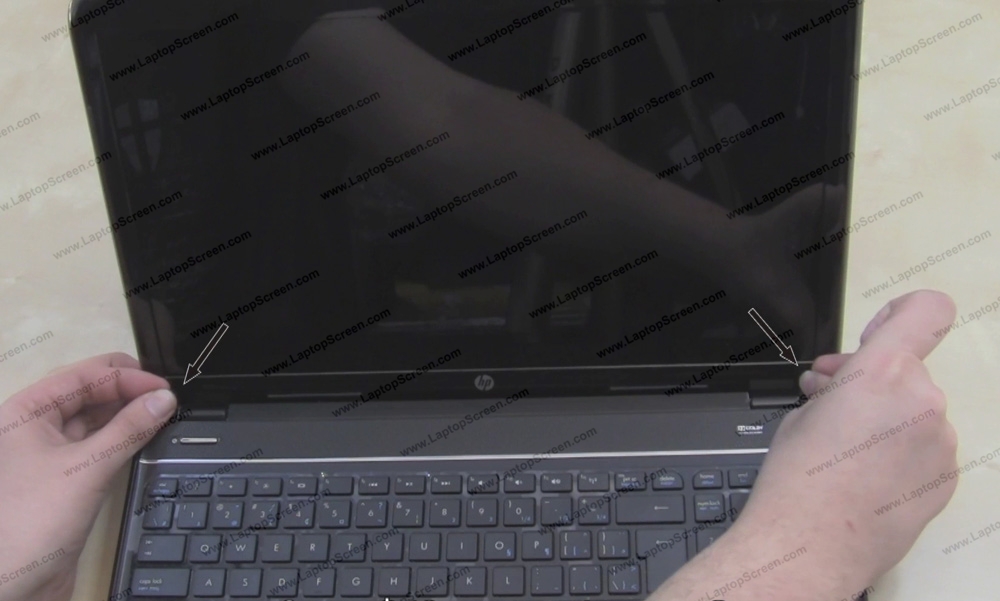
3 Using an X-Acto knife remove 2 protective plastic screw covers at the bottom of the display assembly.
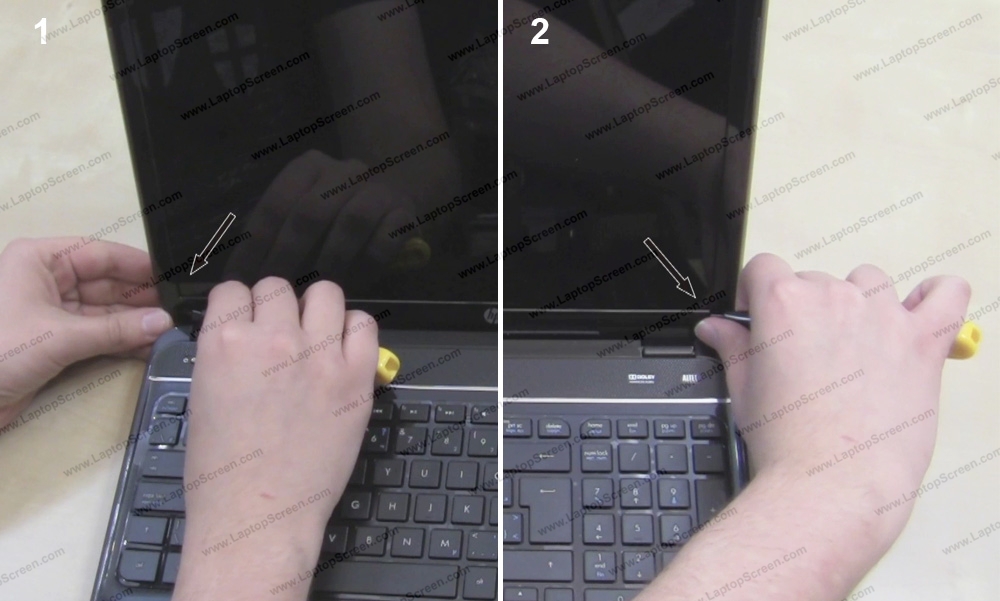
4 Using a Phillips screwdriver remove 2 bezel screws.
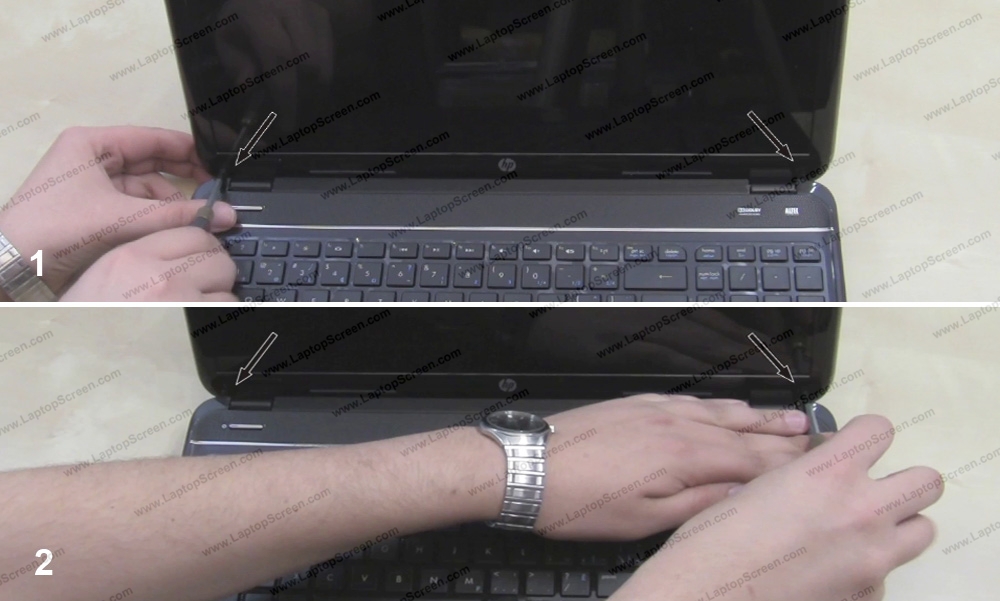
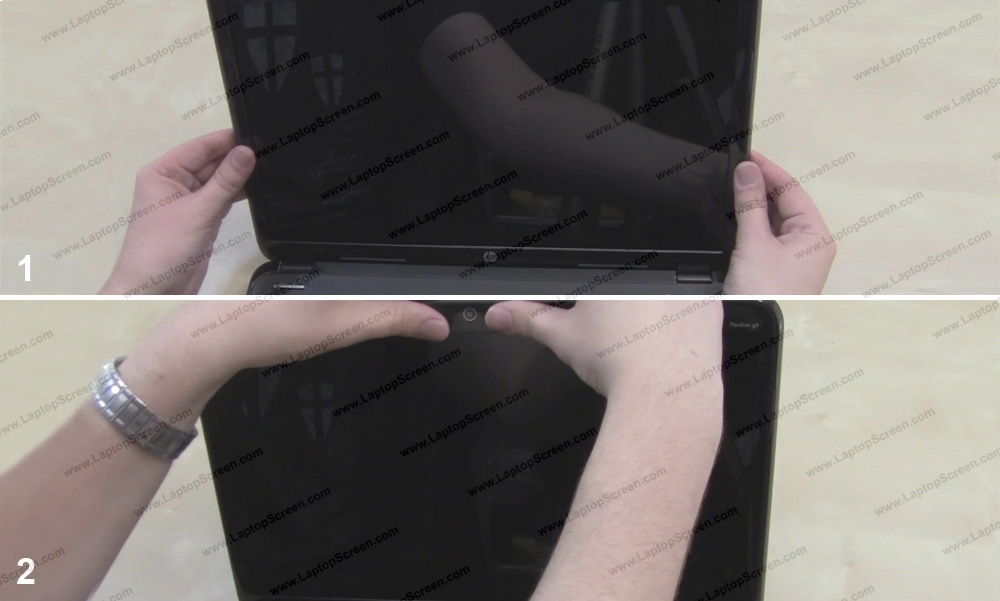
5 At this point you can remove the bezel. Start on one side and gently unsnap the inner edge of the plastic. Move around the perimeter.
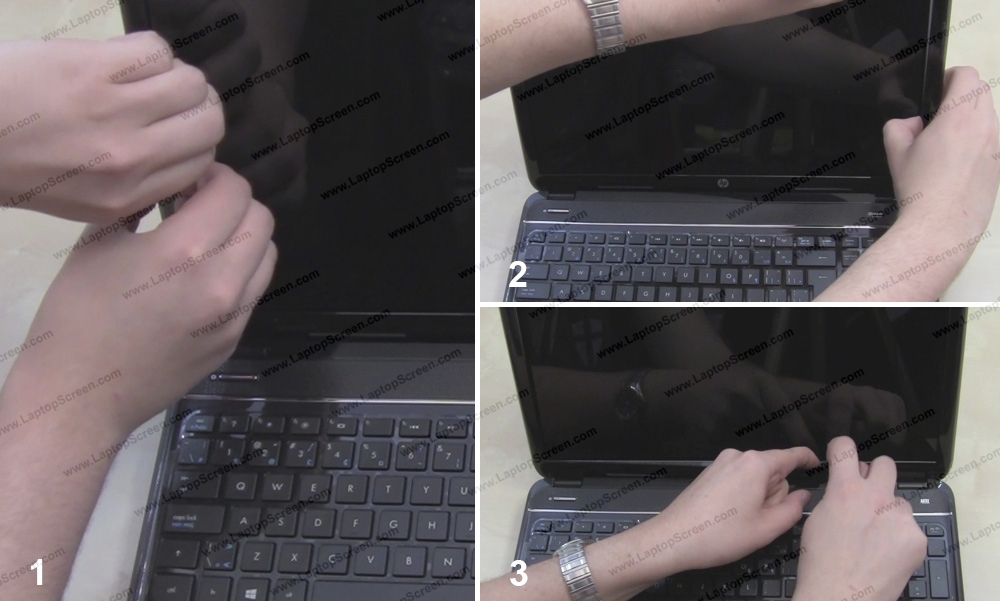
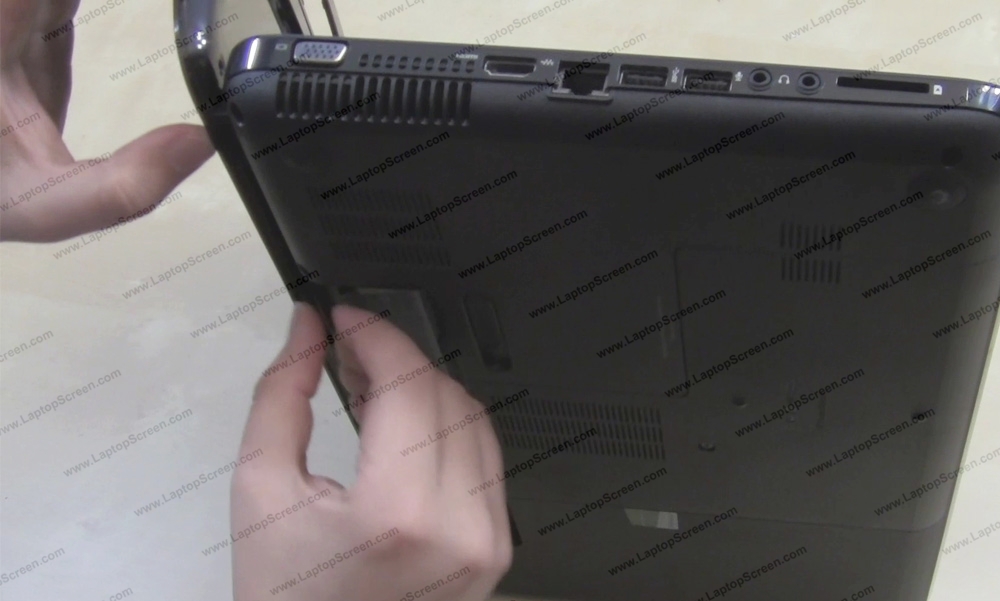
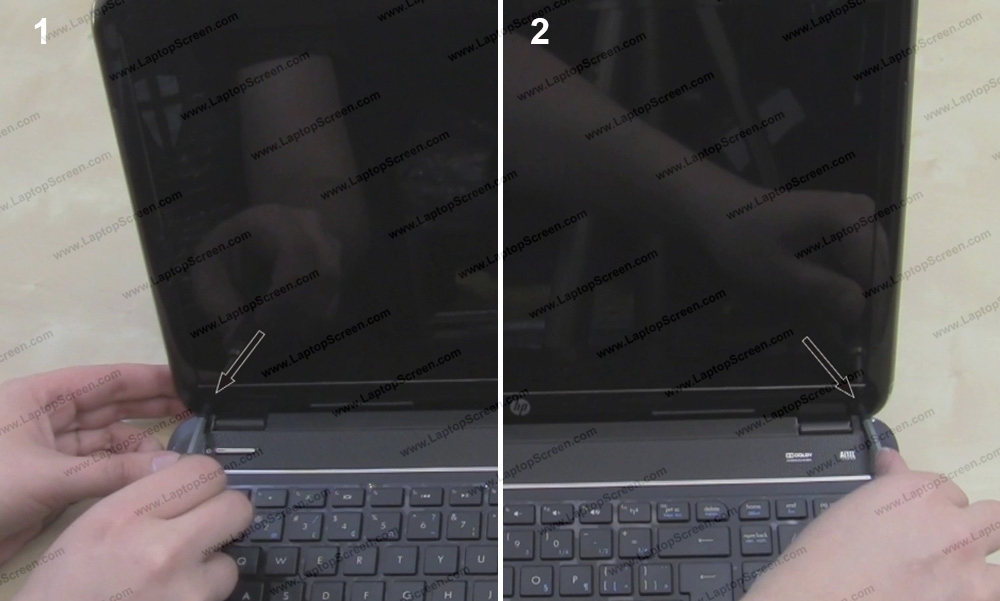
6 To unsnap the bottom edge of the bezel, simply place the laptop on one side and separate the bezel from the back cover.
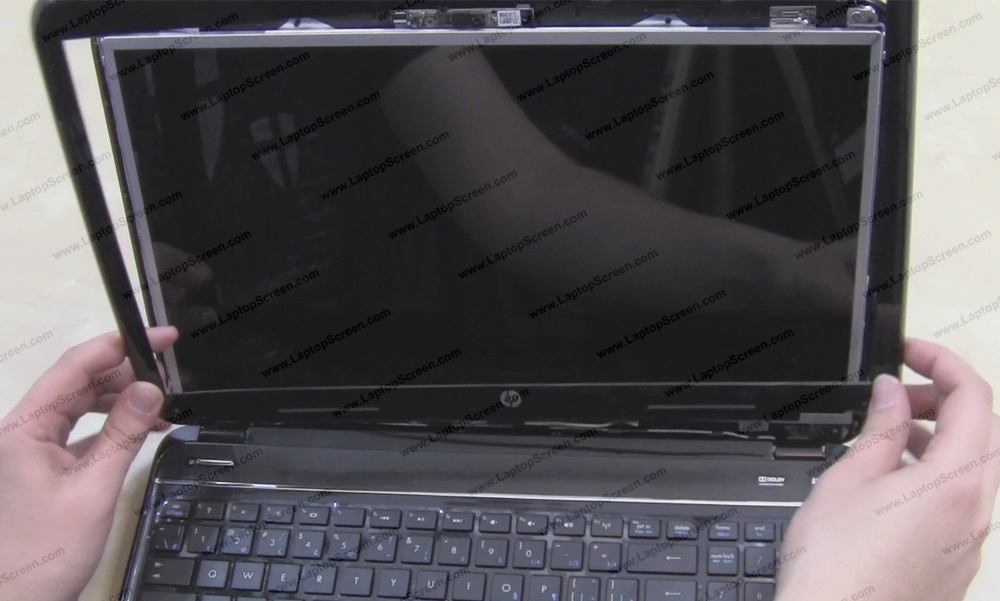
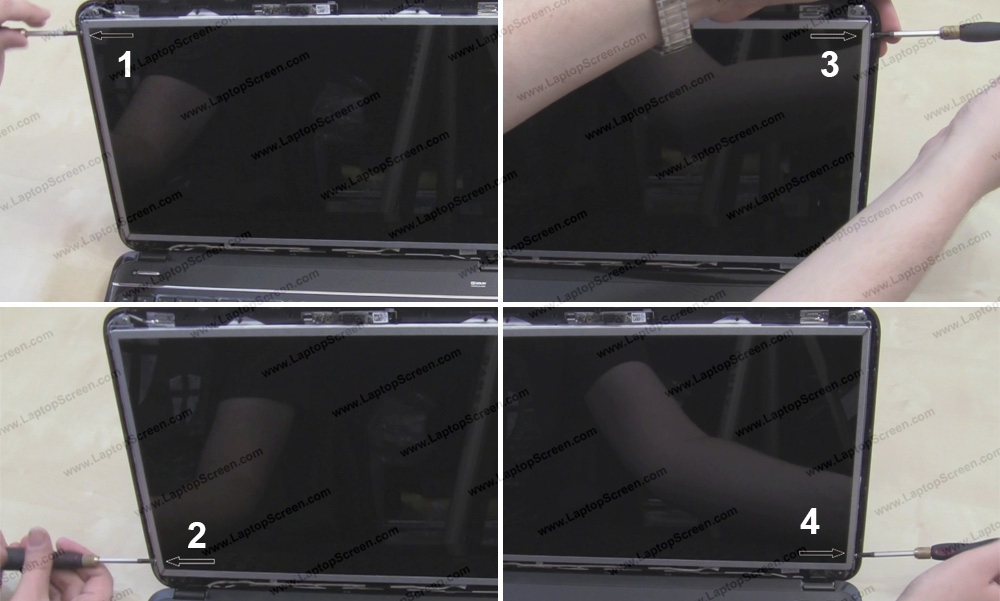
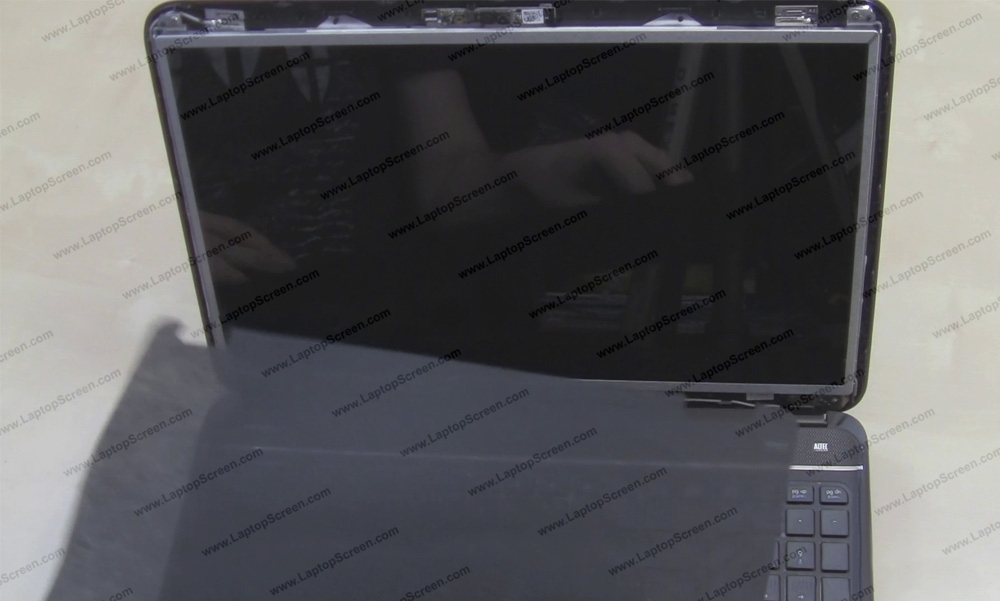
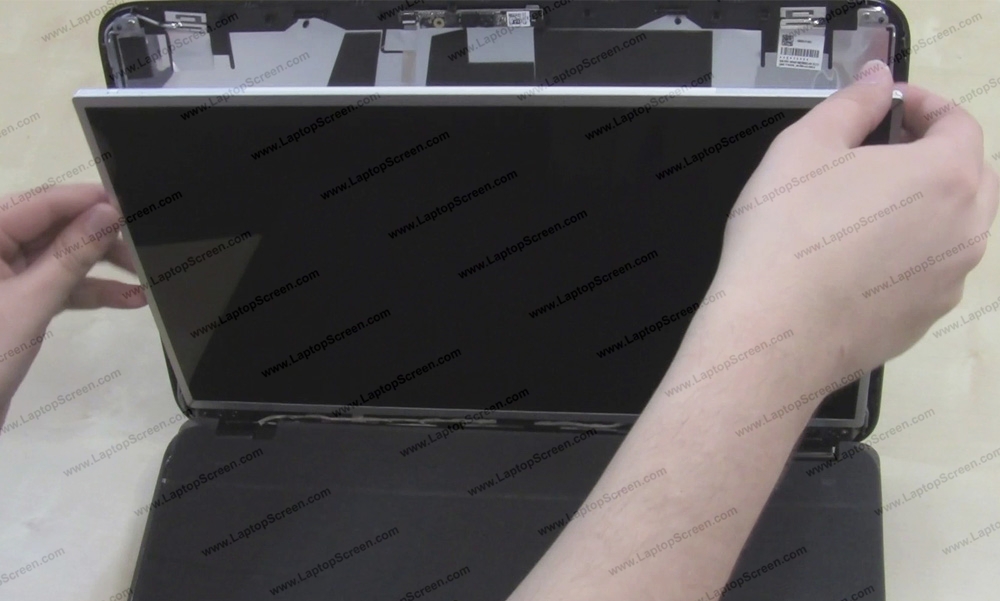
7 Remove 4 small frame screws holding the LCD panel. There are 2 screws on each side.
8 Line the keyboard with a cloth or a paper towel to prevent the screen from scratching.
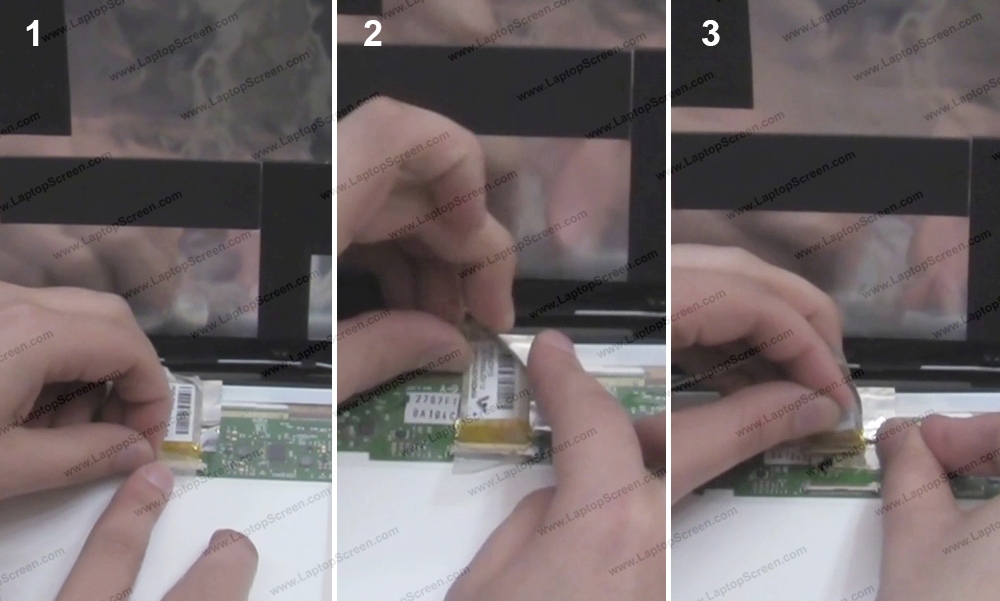
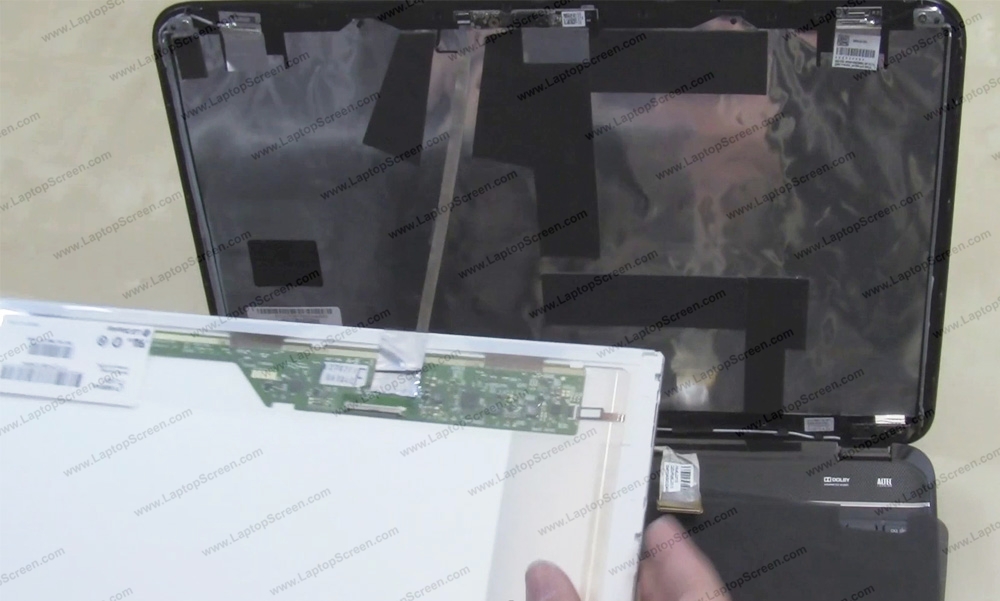
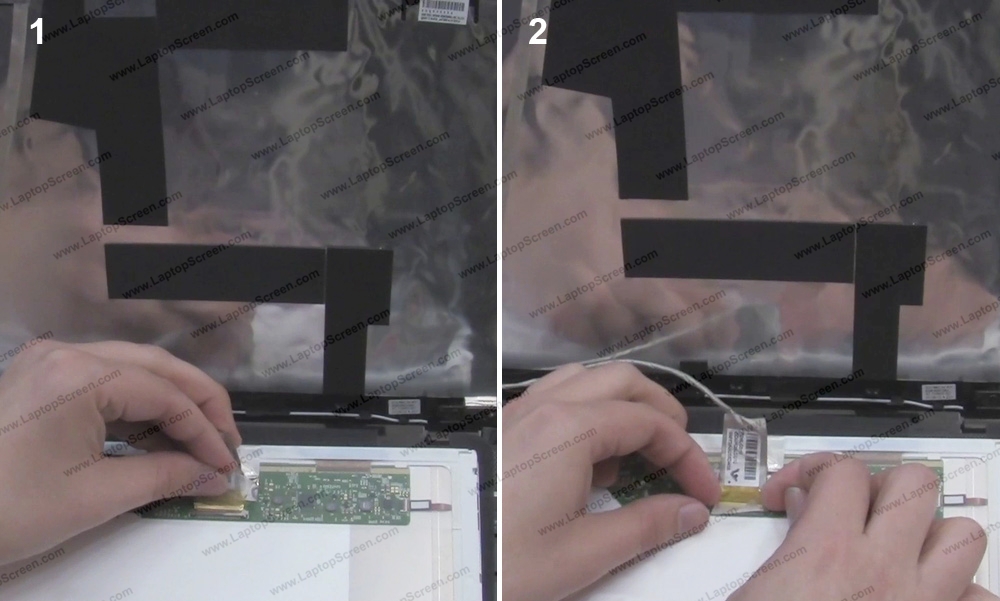
9 Place the LCD on the keyboard.
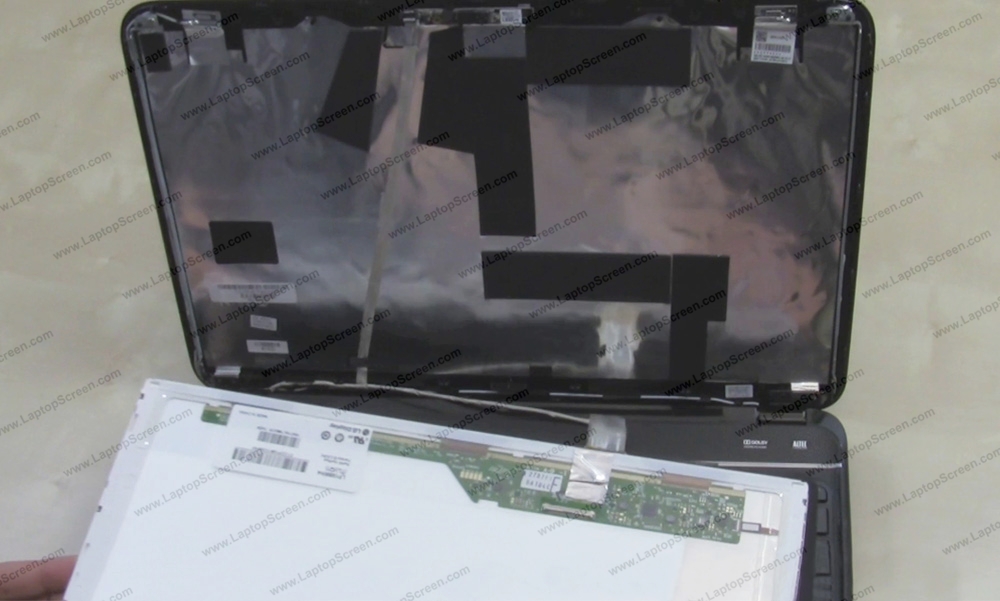
10 Gently peel off the clear tape securing the video connector. Separate the tape holding the video cable as well. Disconnect the video connector.
11 Discard the old panel.
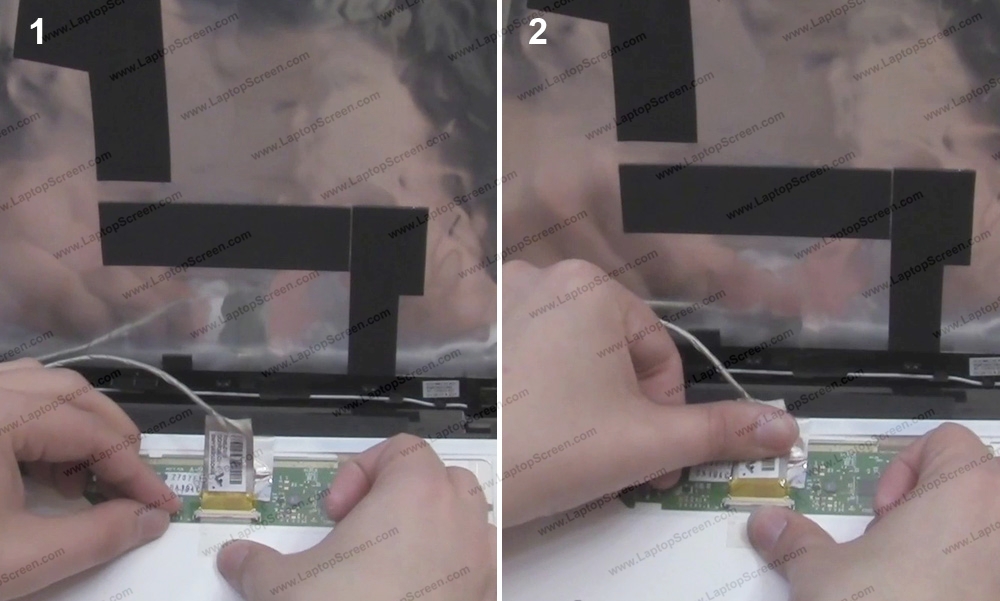
12 Place the new screen on top of the protective layer of a cloth or a paper towel.
13 Gently reconnect the video cable to the new screen. Please keep in mind that all the connectors are extremely fragile. Do not apply too much force while reconnecting the cables.
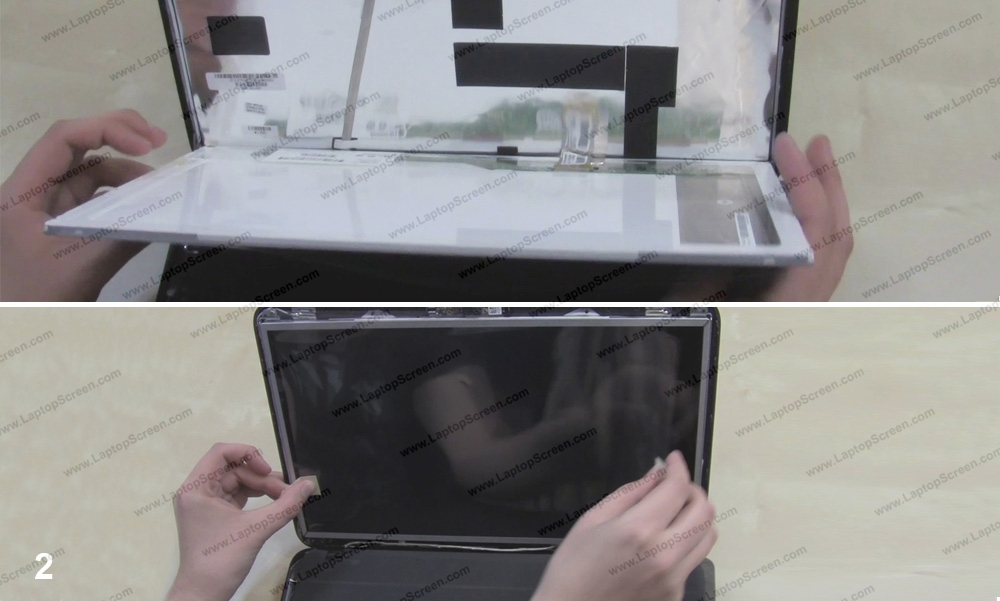
14 Secure the connector with the clear tape.
15 Lift the screen up and remove the protective film.
16 Secure the new screen with 4 frame screws.
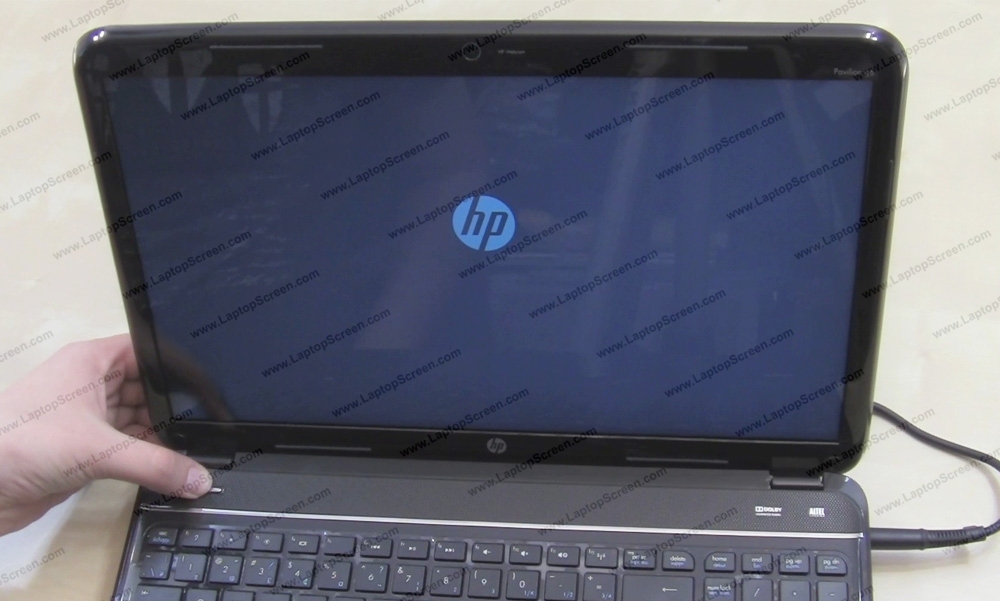
17 Now you can test the screen:
- Reconnect the AC adapter.
- Press the power button.
- If the startup graphics appear - the screen is installed correctly. Press and hold the power button to cancel the boot up.
- Disconnect the AC adapter.
- Reconnect the AC adapter.
- Press the power button.
- If the startup graphics appear - the screen is installed correctly. Press and hold the power button to cancel the boot up.
- Disconnect the AC adapter.

18 Go ahead and replace the bezel. Align the bezel at the bottom first and snap it in place around the edges.
19 To make sure that the bottom of the bezel in snapped in well place the laptop on its side again and snap in the bottom edge.
20 Replace the 2 screws on the bottom of the bezel.
21 Replace the 2 screw covers.
22 Finally reinstall the battery and reconnect the power.
23 You're done!
last updated June 14, 2018